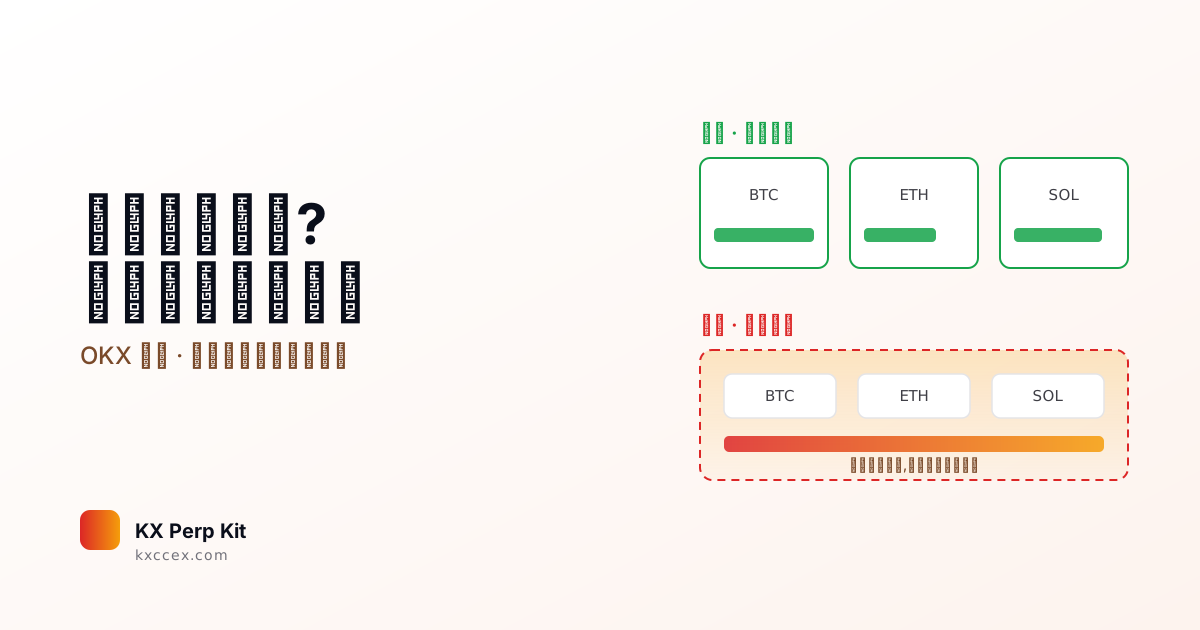
Isolated margin only uses the margin you assigned to that one position to absorb losses. If it gets liquidated, the most you lose is that margin; the rest of your account and your other positions are left alone. Cross margin pools the available balance of the whole account as margin, so a losing position draws on that balance to stay open and liquidation comes later — but if it does get liquidated, it can take the entire account with it. In one line: isolated puts a fence around the loss; cross holds out longer but has no fence.
Start with isolated. It pins the maximum loss of every trade to the margin you assigned, so the risk boundary is clear-cut and you can practise stop-losses and position sizing properly. Cross looks sturdier, but what it really does is put your entire balance on the line: misread the market once without a stop in place and you can lose all your capital in one go. Once your stop-loss discipline is solid, then consider cross for hedging or for running several positions together.
Cross does get liquidated later, because it pulls in the whole account balance to top up margin, which pushes the liquidation price further away. But that also means that before it blows up, it eats through the other money in your account and the profits on your other positions. An isolated liquidation costs you one piece; a cross liquidation can take the account to zero. Holding out longer is not the same as being safer — cross simply widens the risk from one position to the whole account.
On the OKX futures trading screen, the margin-mode toggle sits above the order panel; tap it and choose isolated or cross. Note: a position that's already open can't be switched between isolated and cross. The choice applies to orders you place afterwards, so you don't need to close anything first; positions already open keep their original mode.
1. What a margin mode is (and why the choice matters)
Opening a perpetual position isn't just picking a direction and a leverage level — you also have to pick a margin mode: isolated or cross. Plenty of beginners click straight past it, yet that one setting decides something big: when the market turns against you, how much of your money this position can lose.
First, what margin is. Margin is the capital you put up for a futures position, and the exchange holds it as collateral. Once unrealised losses eat through that margin to a certain point, the system closes the position by force — that's liquidation.
The difference between isolated and cross really comes down to one sentence: how much of your account this position can draw on before it gets liquidated. Isolated can only use the slice of margin you set aside for it; cross can use the available balance of the whole account.
An analogy makes it clearer. Isolated is like giving each position its own watertight compartment: if water gets in, only that compartment floods and the rest of the ship is fine. Cross is like the whole ship sharing one big hold: a leak anywhere is spread across the ship — so it's harder to sink, but if it does sink, the whole ship goes down together.
Below we go through each mode, then a comparison table and how a beginner should choose. If you don't yet have a feel for how a liquidation price is actually worked out, read leverage vs liq price, the math first — the rest will go down easier.
2. Isolated margin: the loss stays locked in one position
In isolated mode you give one specific position its own separate pot of margin. That position's profit, loss and liquidation are tied only to this margin, and it doesn't interfere with the other money or positions in your account.
An example. Your account holds 1,000 USDT. You open a BTC long on isolated, assign just 200 USDT as margin at 10x leverage (a 2,000 USDT notional position). If BTC slides all the way down to liquidation, the loss on this position is capped at roughly the 200 USDT you put in; the remaining 800 USDT is essentially untouched and still available for other trades or for adding margin. (“Lose at most 200” is a simplified example to show the direction; the actual amount also depends on the maintenance margin rate, trading fees, funding fees and so on, so it will differ slightly — it is not a to-the-cent guarantee.)
The isolated liquidation price is simply the price at which those 200 USDT are used up. The higher the leverage, the closer that price sits to your entry, and the easier it is for a single wick to take you out.
The upside of isolated: the risk boundary is crystal clear. The moment you open the trade you know the most it can lose is 200, which makes position management far easier.
The cost of isolated: weak tolerance for volatility. Only that one pot of margin is holding the line, so a wick can liquidate you — even while a large chunk of unused money is sitting in your account.
Who it suits: single-coin speculation, anyone who wants a hard loss cap on every trade, and every beginner who is still learning the ropes.
3. Cross margin: the whole account balance takes the hit
In cross mode, the available balance in the same margin account is used as shared margin for your positions. Whenever a position is underwater, the system automatically draws on that balance to cover it and pushes liquidation further back.
Exactly which money that shared balance covers depends on the account mode you've chosen on OKX — it is not always “every coin in the account goes down together”. In single-currency margin mode, cross shares the balance of that one currency: for a USDT-margined position it shares the USDT in your account and leaves your other coins alone. Only in multi-currency margin mode does the system convert the different coins you hold into one combined equity figure and share all of it as margin — that is when the exposure genuinely spreads across several currencies. So when you read the example below, or phrases like “lose the whole account”, first check whether you're on single-currency or multi-currency mode, because the shared scope is different. If you're not sure, manage the position the more conservative way.
Same 1,000 USDT account. This time you open the same BTC long on cross, 2,000 USDT notional. What's backing the position now is no longer 200 USDT but the full 1,000 USDT. BTC has to fall much further before it eats all 1,000 USDT and triggers liquidation.
The upside of cross: harder to liquidate. Same position, same leverage — the cross liquidation price sits much further out than the isolated one, so an ordinary wick has a hard time reaching you.
The cost of cross: if it really does go all the way to liquidation, you lose the whole account. And if you run several cross positions at once, they all share one pool of margin — one big loss can drag the other positions' margin down with it and set off a chain of liquidations.
Who it suits: intermediate and advanced traders who have a clear hedging need, run combined multi-position setups, and already have a strict stop-loss habit.
4. Isolated vs cross: comparison table
| Aspect | Isolated | Cross |
|---|---|---|
| Margin source | Margin assigned to that position | Available balance of the whole account |
| Maximum loss | The margin assigned to that position | The whole account balance (can be wiped out) |
| Liquidation price | Close to entry, triggers more easily | Pushed further out, triggers later |
| Wick resistance | Weak | Strong |
| Between positions | Walled off from each other | Shared margin, can liquidate in a chain |
| Adding margin | Added to that position by hand | Drawn from the account balance automatically |
| Risk boundary | Clear, known the moment you open | Blurry, depends on the whole account |
| Who it suits | Beginners / single-trade speculation / a hard loss cap | Hedging / multi-position setups / experienced traders |
| In one line | The loss has a fence | Holds out longer, but no fence |
The two rows worth remembering are “Maximum loss” and “Between positions”: isolated fully separates each trade's maximum loss, and its link to your other positions; cross trades that fence away in exchange for a liquidation price further out. Holding out longer and being safe are not the same thing.
5. How a beginner should choose (start with isolated)
Bottom line first: beginners should use isolated. Not because isolated is somehow more advanced, but because it puts the risk in a cage.
Isolated + low leverage + a stop-loss on every trade is the beginner's starter kit. Isolated gives you a clear loss cap; low leverage (3-5x) keeps the liquidation price further away so one wick doesn't finish you; the stop-loss gets you out on your own terms before liquidation triggers. Stack all three and you actually have a chance of surviving long enough to avoid a liquidation, turning trading into logged practice you can review rather than a one-shot gamble.
Why not start beginners on cross? Because cross's resistance to liquidation is a comfortable trap. It keeps liquidation out of sight for a long time, so the unrealised loss snowballs while you can't bring yourself to close — “it hasn't blown up yet, give it a bit longer.” When liquidation finally does come, you lose the whole account, not one trade. Stop-loss discipline is exactly what beginners lack most, and cross magnifies that weakness.
There's another very common beginner mistake: putting a tiny margin on an isolated position and cranking leverage to 50x or even 100x, thinking “isolated can only lose this much anyway.” That's wrong. At high leverage the isolated liquidation price sits extremely close to entry — roughly in the single-digit-percent range (the figure is only illustrative; the real number also depends on the maintenance margin rate, fees and funding) — which puts you on the knife's edge from the very first second and all but guarantees a liquidation. Isolated protects your loss cap, not your odds of getting liquidated — those are set by leverage. To really nail this down, read leverage vs liq price, the math.
So when is cross the right call? Once you can execute stop-losses consistently and genuinely need multiple positions for hedging (for example holding spot while running a perpetual short against it), the shared margin of cross starts to work for you. Until then, isolated is the better fit. For setting a stop that doesn't contradict your position size, see the stop-loss vs position-size paradox.
6. How to switch between isolated and cross on OKX
On OKX you switch between isolated and cross inside the futures trading screen, and the steps are simple:
- Open the OKX app or website, go to the futures trading section, and select the contract you want to trade — for example the BTC-USDT perpetual.
- Above the order panel (below the candlestick chart, near the order buttons), find the margin-mode button for isolated or cross and tap it.
- Pick isolated or cross from the options that appear, then confirm.
- In isolated mode you can also set that position's leverage in the same place; after opening, you can manually add margin to an individual isolated position to push its liquidation price further out.
A few things to watch:
A position that's already open can't be switched between isolated and cross. OKX's help center says so directly. To use the other mode you don't have to close first: pick it in the order panel and place a new order. OKX only merges positions with the same coin, direction and margin mode, so the new position won't fold into the old one.
The switch only applies to positions opened afterwards. Positions that are already open keep the mode they were opened in and are not changed retroactively.
The mode setting is remembered per contract. You can run BTC on isolated and ETH on cross without one affecting the other.
OKX tweaks the exact location and wording of this setting as the app gets updated, but one rule stays stable: open positions keep their mode, and the switch only covers new orders. Remember that and you won't switch the wrong way. What's really worth two extra minutes before switching is estimating this position's liquidation price under both modes; the method is in leverage vs liq price, the math. The wrong margin mode, leverage set too high and no stop-loss rarely show up alone — in the 5 most common perp rookie mistakes all three are in the room at once.
7. Four common myths
Myth 1: “Cross margin can't be liquidated.” It can. Cross only pushes the liquidation price further out; it doesn't remove liquidation. Once the unrealised loss eats through the account's entire available balance, it gets liquidated just the same — and this time everything you have in there goes with it.
Myth 2: “Isolated is safer, so I can go high on leverage without worrying.” This is the most dangerous mix-up of all. Isolated limits how much a single trade can lose, not the odds of liquidation. The higher the leverage, the closer the liquidation price; isolated at 100x gets liquidated almost as soon as it opens. Safety comes from low leverage plus a stop-loss, not from the mode itself.
Myth 3: “On cross I don't need a stop-loss.” The exact opposite. Because cross holds out longer, it becomes easier to let a loss run, blow past your stop level and end up losing everything in one go. No mode replaces a stop-loss; set one whichever mode you're on.
Myth 4: “Isolated and cross give different returns.” Same position, same market move — the profit and loss on paper is identical in both modes. The only differences are how much money a loss can drag in and how late liquidation triggers. Don't expect a mode switch to lift your returns; it changes your risk exposure, not your rate of return.
Get these four down and you already understand margin modes better than most beginners. The hard part isn't remembering the differences — it's answering one question the next time, before you tap that button: with this switch, do you want to nail down this trade's loss cap, or push the liquidation price a little further away? Between isolated and cross you only get one of the two — which one are you picking?