Typing an email or phone number, setting a password, taking one verification code — the sign-up step itself is over in a few minutes. What actually eats time is the identity verification and the security setup that come after it. Which documents the check needs and how fast review moves follow OKX's current rules and the prompts on your own account page; photograph the documents cleanly the first time and the odds of a back-and-forth drop a lot.
It goes in the “Referral / invite code” field on the sign-up form; some versions fold that field under “More options”. If you opened the page from a link that already carries the code, the field usually comes pre-filled with OK6512; if it doesn't, type it once by hand. Adding it after sign-up is finished is generally not possible, so don't skip that field.
It gives a fee discount under the OKX Affiliate policy, capped at up to 20%. The exact share moves with platform policy, product type and the state of your account — it is not a fixed number and no specific amount is guaranteed. The rate on your own fee details page after you log in is the one that counts. A referral code does not change your VIP tier; the code discount and the VIP discount are two separate systems.
Generally no. On an account that has not completed identity verification, some deposit, trading and withdrawal functions are locked; exactly which ones, and which tier unlocks what, follow OKX's current rules and your own account page. Your verified identity is also the proof that the account belongs to you if you ever have to appeal or recover it — clearing it early is less trouble than clearing it late.
Not opening a position — first get the security and the numbers right: turn on two-factor authentication (an authenticator app first, don't lean on SMS alone), set an anti-phishing code, switch on the withdrawal address whitelist. Then run this position's liquidation price and size through a calculator. The leverage dial is the last knob you should touch.
1. If you trade perps, two extra things to think about at sign-up
If you are opening an account just to buy some spot and sit on it, finishing the sign-up flow is enough. But since you clicked into a site about perpetual contracts, two things about this step are worth thinking through before you start — both belong to the category of “decide it now or you can't fix it later”.
The first is where your fee clock starts. An exchange's fee tier is not judged on how long you have been around; it is judged on trading volume and account assets inside a rolling window. Which means that from the first order you place after signing up, you are already accumulating data into that window. In the same way, whether you filled in a referral code at sign-up decides whose name your account sits under in the Affiliate system — that attribution is fixed the moment the account is created and basically cannot be changed afterwards. For someone who buys spot once, none of this matters; for someone about to move in and out of perps frequently, one-way fees multiplied by a round trip and then by a year of orders is real money.
The second is how verification tiers map to features. Identity verification is not only a compliance ritual — it directly determines which functions your account can use and how much you can deposit and withdraw. An unverified account usually can't even get past funding, let alone open a position. Which tier unlocks what does get adjusted by the platform, so treat what your own account page shows as authoritative — but the order is fixed: verify first, then talk about trading.
Stack those two together and the sensible order falls out: get your materials ready → sign up (with the referral code) → verify your identity → set up security → fund the account → do the math before the first order. The rest of this piece follows exactly that order. A few of our own tools are linked along the way, at the points where you will actually need them.
2. Get these ready before you start
When people stall on opening an account, it is rarely because the flow is complicated — it is because they didn't have their things ready, so halfway through they go hunting for a document in a drawer or installing an app on their phone, and the stop-start is what makes them mistype. Spend five minutes putting the following within reach:
An email address you will keep for years. No disposable addresses, no work addresses. This mailbox is your main credential for resetting a password later, receiving security notices, and appealing if it ever comes to that. The risk with a work address is very concrete: the day you leave the job, the mail stops reaching you.
A phone number, with the right country code. Picking the wrong country code is the number-one reason codes never arrive — far more common than a signal problem.
An in-date identity document. ID card or passport, either works; what matters is that it hasn't expired. While you're at it, slide it out of its plastic sleeve — sleeve glare is the classic reason a verification gets bounced.
An authenticator app. Google Authenticator, Authy, or the code generator built into your password manager all work. The rotating codes it produces don't depend on the SMS network, which makes them steadier than text messages and much harder to hijack along with your SIM.
A password manager. The password on an exchange account has to be unique — never shared with your email or your social accounts. Human memory doesn't hold a pile of random strings, so hand that job to a tool.
One more note about regions: when you sign up and verify, enter the information that genuinely matches your document. The platform restricts certain regions as a compliance policy, not as a documents problem; trying to get around it by any means will at best fail the check and at worst freeze the account with your funds inside. This is not worth gambling on.
If you want a list you can tick off item by item, with a progress bar, that is exactly what our sign-up and KYC checklist tool is for — pure front-end, and your ticks are never uploaded.
3. The sign-up flow: the form, the codes, and that referral field
With everything to hand, this stretch is genuinely short. Wording on the web and in the app shifts slightly between versions, but the skeleton is stable:
- Open the sign-up page. On the web it is the “Sign up” button in the top-right corner; in the app it is the sign-up entry on the first screen. Check the address bar reads
okx.com— look-alike sites in search results are a real risk, and §5 covers how to defend against them. - Choose email or phone. Either works. Email doesn't break if you change numbers; a phone number logs in faster. Pick one and fill it in, watching the country code on the phone field.
- Set a password. Generate a unique one in your password manager. Don't reuse.
- Enter the referral code. The form normally has a “Referral / invite code” field; some versions fold it under “More options” or behind a small expander arrow you have to tap. This is the one field in this whole article that you can't come back and fix.
- Take the code, submit. For an email code, remember to check the spam folder; for an SMS code, wait the full sixty seconds before hitting resend — hammering it trips rate limiting, and the more frantic you are the less it arrives.
A little more on the referral code. When you open the sign-up page from a link that already carries the code, that field usually comes pre-filled and you only have to confirm it shows OK6512; if you navigated to the official site yourself, type it in once by hand. Trying to add it after sign-up is finished generally doesn't work — the account's referral attribution is written the moment it is created. So don't skip the field just because it looks like a hassle.
Filling it in changes nothing else about the process: no extra documents, no longer wait, and it creates no data link between your account and this site (we can't see your account, and we shouldn't be able to).
Fill in the referral field before you submit.
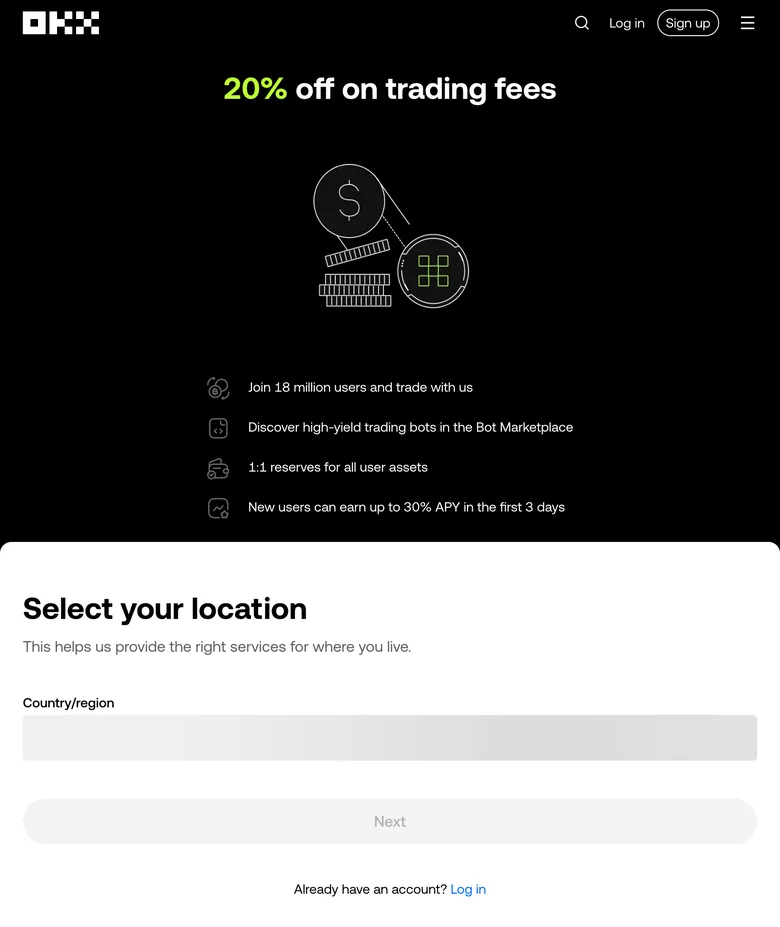
Put OK6512 in the “Referral / invite code” field on the sign-up form for a fee discount under the OKX Affiliate policy, capped at up to 20%*. The link below is the sign-up page with the code attached — once it opens, check that the field shows OK6512.
*We are an independent third party; if you sign up through this link we receive a promotion fee, at no extra cost to you. The actual discount and the products it applies to move with OKX Affiliate policy — no specific number is guaranteed, and the fee details page you see after logging in is the one that counts. We never collect account passwords and we never verify on your behalf.
4. Identity verification: how to submit so it comes back once
Verification is the stage of account opening that most often goes round in circles, and the overwhelming majority of rejections are not “there is something wrong with you as a person” — they are small problems at the level of photos and typed details. The system wants to confirm three things: that you are a real person, that the identity you entered really is yours, and that your region is allowed to use the service. Hold those three in mind and troubleshooting has a direction.
OKX identity verification is tiered, and different tiers unlock different features and limits. What the tiers are called, what each unlocks and which documents each needs get adjusted by region and policy, so treat OKX's current rules and what your own “Identity verification” page shows as authoritative — we are not pinning numbers down here. The practical advice is this: clear the basic tier cleanly first, and top up later when you need higher limits or a fiat channel. Trying to fill in every document at once tends to leave you stuck on one item and stall the whole flow.
When you submit, these few details save most of the back-and-forth:
Take the document out of its sleeve and lay it flat on a plain background. A dark desktop works best. All four corners and the border inside the frame, and don't tilt it too far.
Flash off, natural or soft light. Glare and blur are the number-one reason for rejection — if the OCR can't read the characters it simply refuses. No screenshots, and no photographing a document displayed on a screen.
Copy the name off the document character for character. Order of family and given names, middle names, spaces and capitalisation all aligned; for a passport, typing it as it appears in the machine-readable zone at the bottom is the safest. The system compares what you typed against what it read off the document, and one character out can register as a mismatch.
Do the face check somewhere evenly lit. Don't stand with your back to a window, take off mask and hat, follow the prompts in slow motion, and use a stable Wi-Fi connection. Several failures in a row will rate-limit you temporarily — wait a while and try again rather than forcing it.
If you have already been rejected, or you're stuck on “under review” with nothing moving, we have a piece specifically about that: what to do when OKX identity verification fails takes eight common failure causes apart one by one, including codes that never arrive, region restrictions, and how to reach support through an official entry instead of walking into a fake one.
Don't just sit there while review runs. Set up the security switches from the next section, or work out the numbers section 7 asks for, so that the moment verification clears you can get straight to work.
5. The first hour after the account exists: four switches
While there is still no money in the account is the most comfortable moment to do your security setup — if you get something wrong, lock yourself out, or bind the authenticator badly, the worst case is starting over, with no funds sitting there taking the risk with you. Come back to it after you have funded and opened a position, and that gap in between was wide open for nothing.
| Switch | What it blocks | How to set it without slipping up |
|---|---|---|
| Two-factor authentication (2FA) | Someone logging straight in after your password leaks | Bind an authenticator app first, don't leave only SMS; copy the recovery key offline while binding |
| Anti-phishing code | Phishing mail dressed up as official | Set a string you will recognise; official mail then carries it, and anything without it is fake |
| Withdrawal address whitelist | Assets moved to a stranger's address after an account takeover | Add your own regular addresses first, then turn on “withdraw to whitelisted addresses only” |
| Password and device hygiene | Credential stuffing, a session left behind on a shared device | Unique password; never log in on a public computer; glance at your login-device history now and then |
Of the four, the authenticator and the whitelist carry the most weight. The authenticator splits “knows the password” from “holds the rotating code” into two separate things; SMS verification falls over when a SIM is hijacked, an authenticator does not. The whitelist is the last gate — even if someone really does take over the account, coins can only travel to addresses you set in advance.
One trap deserves its own line when you bind the authenticator: back up that recovery key (or QR code) offline. Lose the phone, reinstall the system, delete the app by mistake, and without the recovery key you are into a manual appeal, which takes longer than you think. Written on paper in a locked drawer, or stored in your password manager — either beats living only on the handset.
The logic of the anti-phishing code is plain: you choose a string, and every email the platform sends you carries it. From then on, when any mail claiming to be from the exchange lands, look for the string first — no string, delete it. That single move blocks a fair share of impersonation mail, and it costs thirty seconds.
While we're here, two anti-fraud rules worth nailing down: official channels will never ask for your password, verification code, private key or seed phrase; and any so-called support agent who wants you to transfer a “margin” or an “unfreezing fee” first is one hundred percent fake. Anyone who messages you out of the blue offering to enable something or unfreeze something — no hesitation, block them.
6. Fees have been counting since day one
This section is our home turf, and it is the part most people only notice after the account is already open. The cost of trading perps is not just the spread — a fee is charged every time you open and every time you close, and the scale of it over time is well beyond most beginners' intuition.
Maker and taker are charged differently. Place a limit order that rests on the book waiting for someone to hit it and you are a maker — you supplied liquidity. Send a market order, or a limit order that matches against the existing book immediately, and you are a taker — you consumed liquidity. At every tier, the taker fee is higher than the maker fee. That isn't an arbitrary decision by the platform; it is the incentive direction the order book mechanism dictates.
One very practical consequence: if you're trading a medium or long horizon and you are not desperate to be in this second, try to rest a limit order and wait to be filled. There is an order option called Post Only that forces your order to fill as a maker only — the moment the system detects it would immediately take from the book, it cancels instead, and you re-post. Leaving it on by default while you're inexperienced avoids the surprise of “I meant to be a maker and got charged as a taker”.
How the fee tier is judged. The OKX VIP system sets your tier from trading volume and account assets inside a rolling window, taking whichever of the two conditions is better for you, and recalculating on a schedule. So every trade after you sign up is adding to that window. The specific thresholds, the fee attached to each tier and the exact recalculation timing are adjusted by the platform from time to time — we are not pinning those numbers down here. For the current structure, go to the official fees page; for what you personally pay, log in and open the fee details page inside your account. If you want to understand how the ladder works and how far apart the rungs sit, our piece on OKX VIP tiers and the perpetual fee ladder takes it apart in more detail.
The referral discount and the VIP discount are two different things. This is the single most common confusion we get asked about, so here it is separately:
| Dimension | VIP tier discount | Referral code / Affiliate discount |
|---|---|---|
| What sets it | Your own trading volume and account assets | The referral attribution you entered at sign-up |
| When it is set | Moves dynamically inside a rolling window | At the moment of sign-up, and generally unchangeable after |
| What moves it | How much you trade | The platform's Affiliate policy |
| Size | Depends which rung you reach; see the official fees page | Capped at up to 20%, no specific number guaranteed |
| In one line | Trade more, pay a lower tier | A choice you make once, at sign-up |
Entering a referral code will not raise your VIP tier, and it will not lower it either — the two lines run independently. Conversely, climbing the VIP ladder does not cancel the referral discount. As for how much the discount actually is, the platform commits to no fixed number and it varies with policy, product type and account situation; we don't promise one on its behalf either. The rate on your fee details page after you log in is the answer.
How to estimate this cost yourself. You don't need to memorise any specific rate — one formulation is enough: the fee on a trade ≈ notional position value × one-way fee rate × 2 (once to open, once to close). Notional position value is your capital multiplied by leverage, so the higher the leverage, the higher the fee attached to the same capital — a point plenty of people never work out. Substitute your own rate, multiply by how many trades you plan to make in a year, and you'll know whether the fee tier is worth caring about in your case. Perpetuals also carry a cost that is nothing like a trading fee, called funding, settled between longs and shorts each period; for that see fees plus funding rates in full, or convert it straight into an annual figure with the annualised leverage cost calculator.
7. Account ready ≠ cleared for high leverage
Verification passed, security switches set, money moved into the trading account — and at that point the leverage slider on screen looks awfully friendly. This is the moment beginners most often come unstuck: being able to place an order and being ready to place one are two different things.
For the first trade we'd suggest this order, with a tool for each step:
Decide the maximum loss on this trade first, then work backwards to the size. Not the other way round. Most people start from “how big should I go”, and only then discover there is no room left for the stop — a tension we have written about separately in the built-in conflict between stop-loss and position size. Position share doesn't have to be a guess either: the Kelly position calculator takes your estimated win rate and payoff and returns full, half and quarter Kelly. Crypto is volatile, so in practice most people work from the more conservative rung.
Work out the liquidation price and write it down. Not “roughly somewhere below” — the actual number. Feed entry price, leverage and direction into the liquidation price calculator and it returns the level plus how far it sits from the current price. Do that once and you get a very physical sense of what high leverage means: the higher the leverage, the closer liquidation sits to your entry, close enough that a single wick reaches it. The maths behind it is in leverage multiple vs liquidation price.
Use isolated margin to start. Isolated caps the worst case on this trade at the margin you allocated to it, so a blow-up doesn't drag in the rest of the account; cross survives longer before liquidation, at the cost of exposing the whole account. Where that selector sits in the order ticket, and how it fits the rest of the flow, is walked through in the OKX perpetual 24-hour workflow.
Attach the stop at the same time as the order. Not “I'll cut it manually when it drops” — when it really drops, most people can't bring themselves to. How to attach TP/SL, conditional orders and trailing stops on OKX, and whether the trigger should use the mark price or the last price so a wick doesn't set it off, is covered concretely in the complete guide to OKX TP/SL and conditional orders.
Make the first trade a small one. The point isn't to make money, it's to walk the whole chain once: transfer, open, watch unrealised P&L tick, trigger the stop, close, see the money land back in the account. Once you have been through that chain, every judgement afterwards is steadier.
On leverage, one unambiguous line: leverage magnifies profit and loss alike, and it does not raise your win rate. What high leverage really does is compress the price range you can survive into something very narrow — narrow enough that ordinary market noise is sufficient to knock you out. A beginner keeping leverage low and size small is not being timid; they are giving themselves the chance to still be here on the day the market finally makes sense.
8. Three things people trip over in the first week
Work through the seven sections above and your account is fundamentally clean. The three pits below are the ones that show up most often in the week after opening it:
Trip one: 2FA bound to SMS only. Text messages are the most convenient and the most fragile — a hijacked SIM or a re-issued number and the code arrives in someone else's hand. The fix is easy: go into security settings, bind an authenticator app, copy the recovery key offline. Five minutes, and a whole category of risk is gone.
Trip two: assuming the referral code can be added later. Plenty of people skip that field at sign-up because it looks like a nuisance, then go and ask support a few days later whether it can be added; the answer is usually no. Referral attribution is fixed the moment the account is created. If you genuinely skipped it, don't force a workaround either — registering multiple throwaway accounts to “start over” trips risk control and costs more than it saves. Stay on the account you have.
Trip three: high leverage, cross margin and no stop, all on the first order. Any one of those three on its own is trouble; together they are essentially waiting to be cleared out by an ordinary swing. Do the opposite: isolated margin, low leverage, small size, stop always attached. That combination will not make you money fast, but it gives you a next time. If you'd rather see how other people crash first, the five mistakes perp beginners make most lays the common scenarios out clearly.
Which brings us back to the line at the top: opening an account is not a procedural exercise, it is building yourself a starting point that doesn't fall over easily. Get this layer of account setup right and all your energy afterwards can go where it belongs — reading the market, managing positions, reviewing your own trade history. Those are the things that decide whether you get to stay in this market.